Introduction
Acrylic coatings offer a robust, economical solution for enhancing the longevity and performance of roofs, especially in dynamic climates like that of Santa Clarita. These coatings not only protect against the harsh sun and unpredictable weather patterns but also improve energy efficiency. IRC Roof Solutions, a leader in acrylic coating services in Santa Clarita, brings you a detailed guide on how this process is performed to ensure maximum effectiveness and longevity.
When Should Acrylic Coating Be Applied?
The timing of applying an acrylic roof coating is crucial for its optimal performance. Typically, acrylic coatings should be applied when the weather is dry, moderate, and consistent. In Santa Clarita, the ideal months are late spring through early fall. During this time, the temperature and humidity are favorable, providing the best conditions for the coating to adhere and cure properly. It’s important to avoid application during the winter months or during peak summer heat when temperatures can exceed 95°F, as this can affect the coating’s longevity and adhesion.
Step 1: Inspect and Clean the Roof Surface
The first critical step in the acrylic coating process is a thorough roof inspection. This involves checking for existing damage such as cracks, splits, or punctures. At IRC Roof Solutions, our team ensures that all necessary repairs are completed before applying the coating. After the inspection, the roof surface must be meticulously cleaned to remove dirt, debris, and existing loose coatings. This cleaning ensures maximum adhesion of the new acrylic coating.
The Importance of a Clean Surface
A clean surface is paramount as any dirt or residue can interfere with the adhesion of the acrylic coating. A pressure wash is commonly used to clear away stubborn dirt and ensure that the surface is ready for the next steps.
Step 2: Moisture Check and Repairs
Before applying the coating, it’s essential to check for moisture within the roofing material, as trapped moisture can cause bubbling or blistering, compromising the coating’s integrity. At IRC Roof Solutions, we use advanced moisture detection tools to ensure any trapped moisture is identified and addressed. If any repairs are needed, we make these prior to coating application.
Step 3: Prime the Surface
Depending on the existing roof material and its condition, a primer may be necessary to enhance adhesion. Priming helps fill tiny imperfections on the roof surface, providing a smooth base for the acrylic coating. The primer needs to be allowed sufficient time to dry, following the manufacturer’s guidelines meticulously.
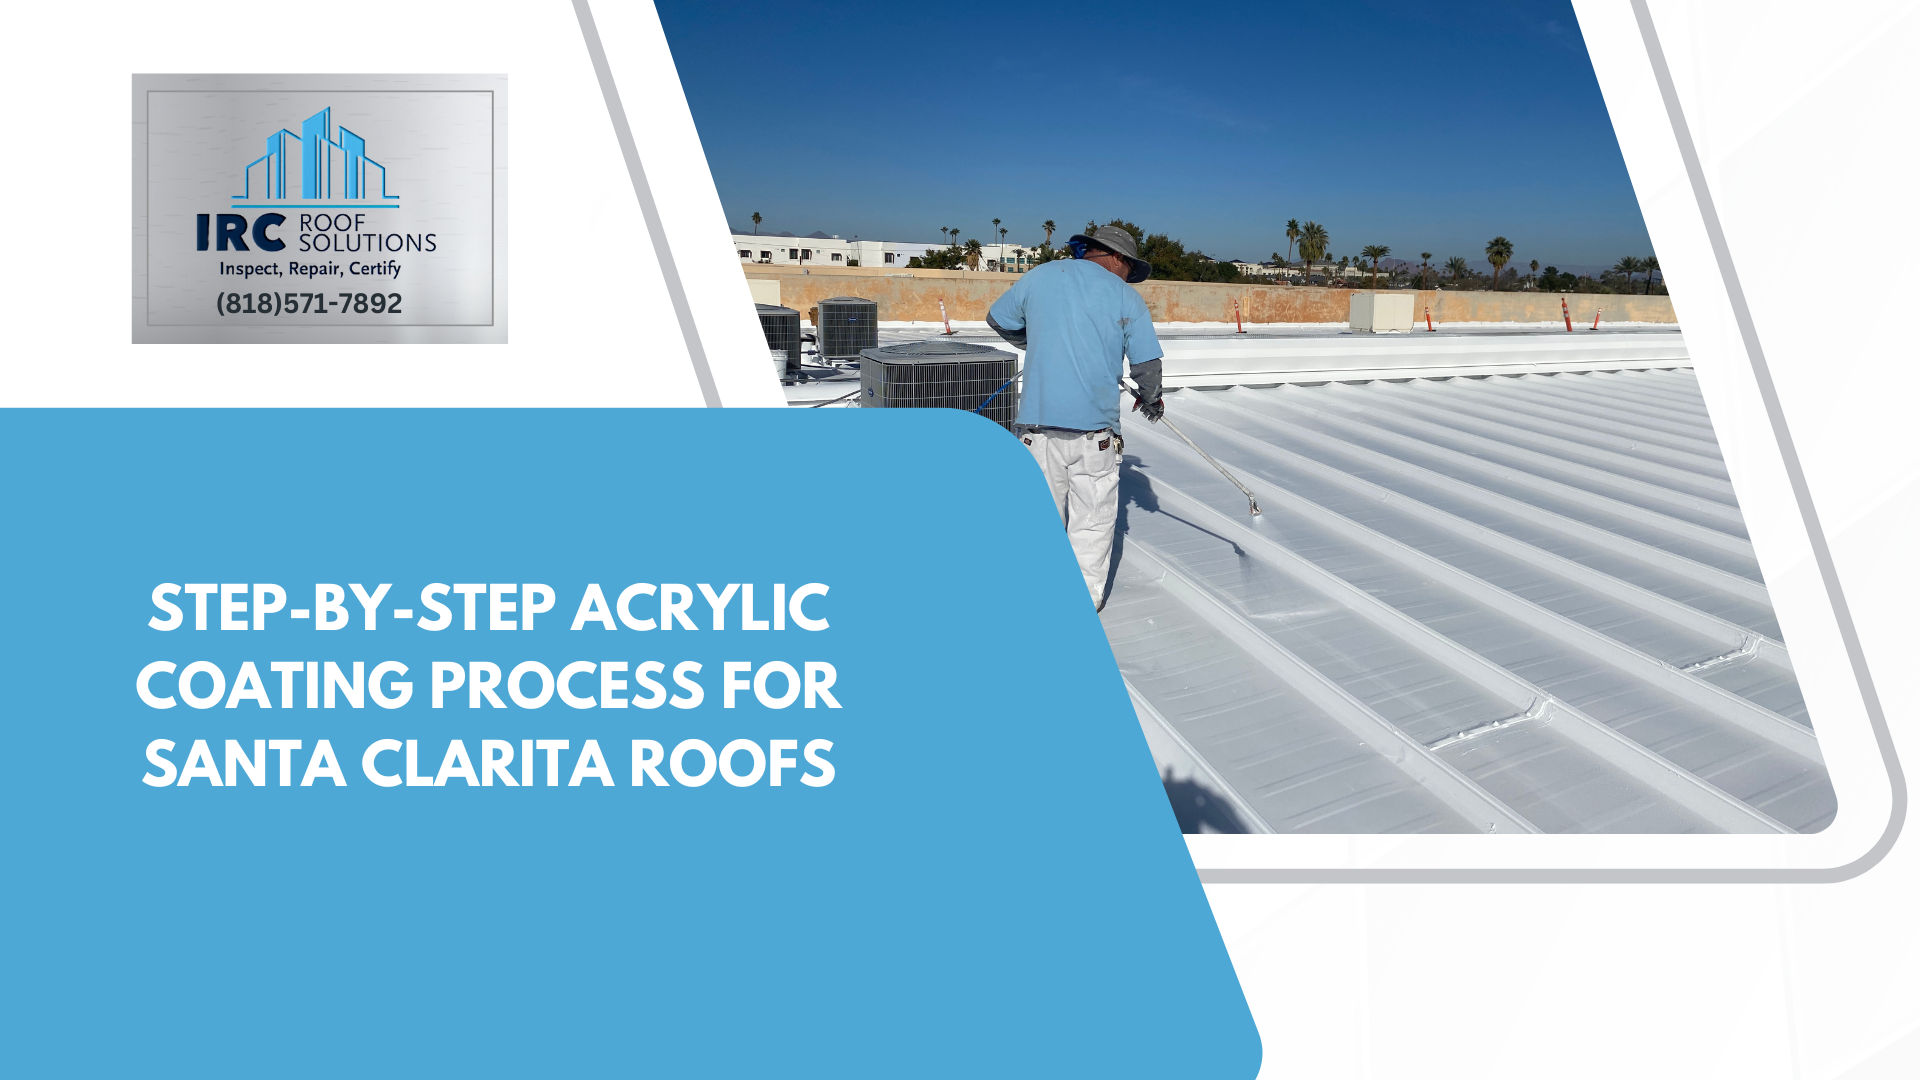
Step 4: Application of the Acrylic Coating
Once the roof surface is primed and ready, the application of the acrylic coating begins. This involves applying the coating evenly across the surface, usually using rollers, brushes, or airless spray equipment. At IRC Roof Solutions, we ensure a uniform thickness to prevent any weak spots that might lead to leaks or other issues.
Multi-Layer Application
For enhanced durability, multiple layers of acrylic coating are often applied. This multi-layer approach allows for more thorough coverage and added resilience against the elements. Each layer must dry thoroughly before the next is applied, which typically takes 24 to 48 hours based on weather conditions and the thickness of the coat.
Step 5: Inspection and Quality Assurance
After the final layer of coating has dried, a comprehensive inspection is conducted to ensure that the application meets all quality standards and specifications. At IRC Roof Solutions, we perform a detailed assessment to check for uniform coverage, adhesion, and any defects that need addressing before the project is considered complete.
Final Inspection Process
The final inspection is a meticulous process that verifies the coating has been applied correctly, checking for any areas that might require additional attention. The roof is then evaluated for potential discrepancies that could affect its performance.
Step 6: Maintenance for Longevity
Post-application maintenance is crucial to maximizing the lifespan of your acrylic-coated roof. Regular inspections, especially after severe weather events, ensure the roof remains in optimal condition. IRC Roof Solutions provides tailored maintenance plans to help property owners monitor and maintain their roof’s protective layers effectively.
Periodic Maintenance Tips
To prolong the life of your acrylic coating, clear the roof of debris regularly, and promptly address any signs of wear or damage. Our team offers advice and services for ongoing roof maintenance to support the continued health and performance of your roofing investment.
With these steps, IRC Roof Solutions ensures that your roof not only stands the test of time but also contributes to energy savings and enhanced property value. We’re committed to delivering excellence and reliability with every acrylic coating project in Santa Clarita.
![]()
IRC Roof Solutions is a leading commercial roofing contractor proudly serving California, Arizona, Southern California, and the West Coast since 2004. With a steadfast commitment to quality, innovation, and client-first service, we bring over two decades of experience to every project.
Our specialties include roof inspections, leak repairs, re-roofing, acrylic roof coatings, metal roofing systems, and preventative maintenance—tailored specifically for commercial properties. At IRC Roof Solutions, we don’t just build roofs—we build lasting relationships with property owners who demand excellence and reliability.